
Bonjour à tous,
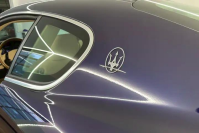
Pour amener le pare chocs avant de la Mazette à peindre, il faut d'abord le démonter, avez vous quelques conseils, plans tutos... ?
Merci de vos retours
Gérard
[3200 GT] Démontage pare chocs
-
Trident12.33
- Bicylindre
- Messages : 125
- Inscription : mer. 29 avr. 2015 10:32
- Localisation : 33
[3200 GT] Démontage pare chocs
3200 GTA
-
bay
- W16
- Messages : 7387
- Inscription : sam. 1 août 2015 20:34
- Localisation : 0
- Localisation : Belgique
- Contact :
Re: Démontage pare chocs 3200 GT
Tu peux utiliser le plan sur RedParts .Trident12.33 a écrit :Bonjour à tous,
Pour amener le pare chocs avant de la Mazette à peindre, il faut d'abord le démonter, avez vous quelques conseils, plans tutos... ?
Merci de vos retours
Gérard
-> http://www.redparts.fr/image_redparts/8 ... 8_t116.jpg
Et pour celui qui maitrise l'anglais :
http://www.sportsmaserati.com/showthrea ... -on-a-3200
-
Trident12.33
- Bicylindre
- Messages : 125
- Inscription : mer. 29 avr. 2015 10:32
- Localisation : 33
Re: [3200 GT] Démontage pare chocs
Merci, celui ci je l'avais déjà mais cela me parait un peu succinct !!!
3200 GTA
Re: [3200 GT] Démontage pare chocs
Je ne vois pas de tuto précis pour la 3200, mais ce qui est dit sur le lien de Bay, en gros, c'est ça :
Front bumper is one of the biggest PITA jobs to do.
On the 4200, First job is to remove the headlights, you have to remove the undertray, indicators, arch liners, plus pipework in the engine bay, all to access some hidden nuts
The 3200 is different and my bodyshop have done both and say the 3200 is even worse.
J'ai retrouvé la procédure ppur la 4200 sur sportsmaserati, ça ne doit pas être très différent
Take your time, put the front up on stands it makes it easier and be prepared for a few sheared bolts and it won't be too upsetting.
Take the undertray off first
Then the front wheels as it makes getting the inner arches off much easier, when they are off you need to release three M6 nuts between the joint of the bumper and wing, the forward most is a sod to get to and it is fixed to a clip that joins them just behind the back of the headlight. Getting to these is just much easier with the wheel off.
Disconnect the three electrical plugs to each headlight. Headlights are held in at least three points including an L bracket up by the inner wing that involves one bolt to the headlight but two up into the underside of the inner wing/bonnet shut, it is necessary to remove the bracket or the light will not move freely out of the front. Make sure it (the headlight assembly) does not slip away from you either!
I found the headlight washer easiest to disconnect at this point, it will drain all the fluid out over you so be prepared to catch it, a simple clip against the bumper on the right hand side.
I next took the side lights out by accessing through the headlamp voids. then loosen the bolts across the top of the bonnet shut and remove the two each side between the wing and bonnet in from the headlight voids, these have a common spreader plate that needs to go back in the right way round so note how it comes out.
Take out the front grille by removing the row of crosshead screws under the top and lube the spring catches across the bottom and you will need to fairly violently work them forward to free it! if you are not re-spraying you may want to mask around the grille first to avoid risking the paint.
Remove the bolts across the front of the bonnet shut and lift the plastic of the bumper by each one and carefully remove the shims remembering or noting how many are in each position!!!
Finally there are just two main bolts fixing the bumper to the chassis rails accessed through the grille void.
Si l'anglais n'est pas ton ami, fais signe, je traduirai.
Bon courage.
Si tu te lances dans l'aventure, prends quelques photos en chemin, ça servira aux autres.
“What this button does is it turns carbon dioxide into noise.” J Clarkson
Merak - Biturbo SI - Shamal - Ghibli Cup 2800 - 3200GT AC - MC Victory
Merak - Biturbo SI - Shamal - Ghibli Cup 2800 - 3200GT AC - MC Victory